


In this photo effects tutorial, we’ll learn how to display a photo in a grid of randomly colored squares! We’ll use Photoshop’s built-in grid feature as a guide for setting up the initial spacing, then we'll turn it into a pixel-based grid using a couple of Photoshop's rarely-used selection tools. We’ll see how to easily select different squares in the grid with the Magic Wand Tool, how to colorize them with adjustment layers and blend modes, and finally, how to adjust the appearance of the grid itself using layer styles!
This version of the tutorial has been updated for Photoshop CS6 and is also fully compatible with Photoshop CC (Creative Cloud). For CS5 and earlier, you'll want to check out our original Color Grid Design tutorial.
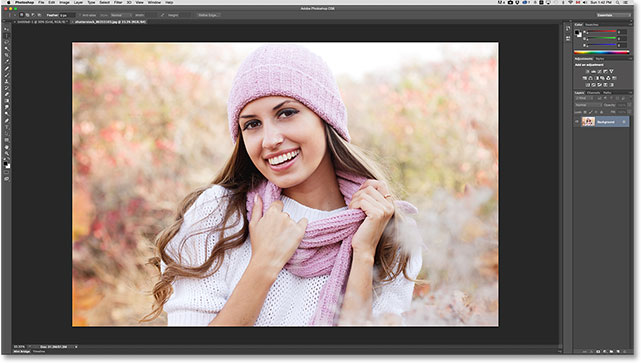
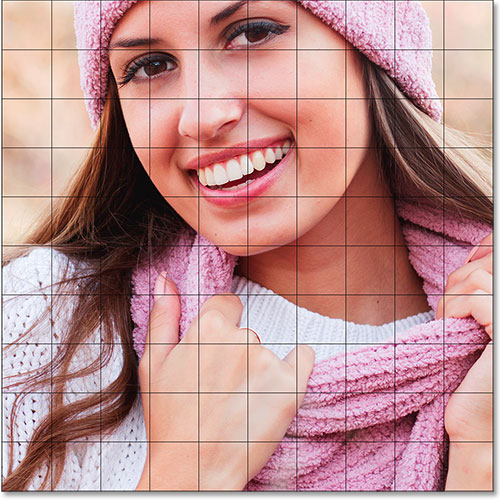
Here's the image I'll be working with (woman with winter clothing photo from Shutterstock):

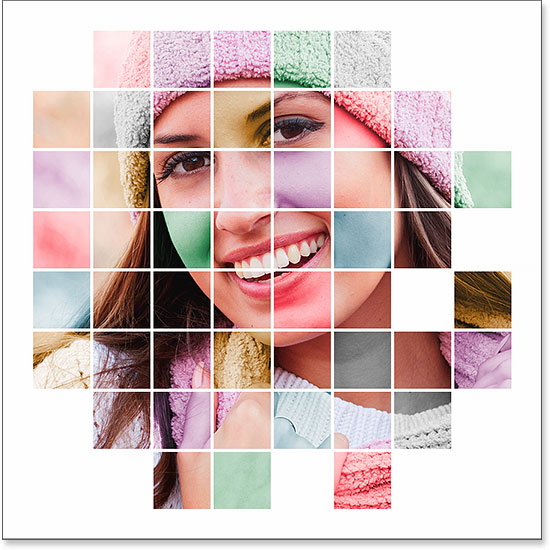
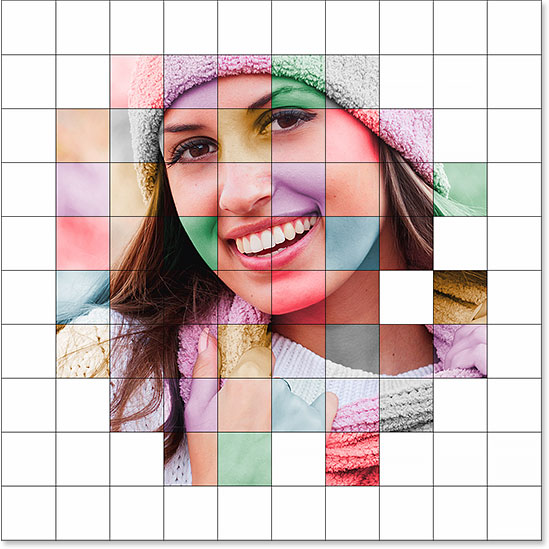
And here's how the color grid design will look when we're done. Of course, you can use whichever colors you like for your effect. This is just one example:

Let's get started!
Step 1: Create A New Photoshop Document
Let’s begin by creating a new document for the grid. Go up to the File menu in the Menu Bar along the top of the screen and choose New:
This opens Photoshop’s New dialog box. This effect works best with a square-shaped document, so for this tutorial, I'll set both my Width and Height values to 1000 Pixels. Of course, feel free to replace my values with whatever dimensions you need, but again, you'll want a square document for the best results. I'm not planning on printing this (it will be strictly for on-screen viewing) so there's no need to worry about the Resolution value (I'll leave it set to its default of 72 pixels/inch), but if you are creating this effect for print, you’ll most likely want to create a document larger than 1000 x 1000 pixels and you'll want to set your resolution to around 240 pixels/inch or higher. Click OK when you’re done to close out of the dialog box. The new document will appear on your screen:
Step 2: Turn On Photoshop's Grid
Next, we'll turn on Photoshop's built-in grid so we can use it as a guide for creating our pixel-based grid. To turn the grid on, go up to the View menu at the top of the screen, choose Show, then choose Grid:
The grid will appear as an overlay on top of your document. We'll make some changes to the appearance of the grid next:
Step 3: Adjust The Number Of Grid Lines
We can adjust the number of lines and sections in the grid using Photoshop's Preferences. If you're running Photoshop on a Windows PC, go up to the Edit menu at the top of the screen, choose Preferences, then choose Guides, Grid & Slices. On a Mac, go up to the Photoshop menu, choose Preferences, then choose Guides, Grid & Slices:
This opens the Preferences dialog box set to the Guides, Grid and Slices preferences. In the Grid section, change the Gridline Every option to 10 Percent, which will give us a 10x10 grid, and change the Subdivisions value to 1 to prevent the grid from being subdivided into smaller sections. Keep an eye on the grid in the document and you'll see a live preview of the changes as you're making them:
Click OK when you're done to close out of the Preferences dialog box. You should now see a grid 10 sections wide and 10 sections tall. It's important to note that this grid isn't actually part of the document. It's simply a visual guide that we'll be using to help us make our own pixel-based grid, as we'll be doing in a moment:
Step 4: Add A New Blank Layer And Name It "Grid"
Let's add a new blank layer to hold the pixel-based grid we're about to create. Press and hold the Alt (Win) / Option (Mac) key on your keyboard and click the New Layer icon at the bottom of the Layers panel:
This opens the New Layer dialog box, giving us a chance to name the new layer before it's added. Name the layer "Grid", then click OK to close out of the dialog box:
Nothing will happen in the document itself, but we can see in the Layers panel that Photoshop has added the new "Grid" layer above the Background layer:
Step 5: Select The Single Row Marquee Tool
To create our grid, we'll use two of Photoshop's very basic and rarely-used selection tools - the Single Row Marquee Tool and the Single Column Marquee Tool. We'll start with the Single Row Marquee Tool. By default, both of these tools are nested behind the Rectangular Marquee Tool, so click and hold on the Rectangular Marquee Tool near the top of the Tools panel until a fly-out menu appears showing you the other tools available in that same spot, then choose the Single Row Marquee Tool from the menu:
Step 6: Click On Each Horizontal Grid Line
As it’s name implies, the Single Row Marquee Tool will select a single horizontal row of pixels in the document. That's it, that's all it does. To use it, we just need to click anywhere in the document and Photoshop will automatically select the pixel we clicked on, plus every other pixel in that row from left to right. We’re going to use the tool to convert the horizontal grid lines into a series of selection outlines. First, move your cursor directly over the top horizontal grid line, then click with your mouse. You’ll see a 1-pixel thick selection outline appear along the grid line. I've circled the spot where I clicked but clicking anywhere on the line will give you the exact same result. If you notice that your click wasn't directly over the grid line, just press Ctrl+Z (Win) / Command+Z (Mac) on your keyboard to undo it and try again:
Next, we'll add the rest of the horizontal grid lines to our selection. Press and hold the Shift key on your keyboard and click on the next grid line below it. This will select a second horizontal row of pixels, and because we had the Shift key held down, Photoshop will add this second selection to the first. Continue holding down your Shift key while clicking on the rest of the horizontal grid lines until a selection outline appears along each of them. When you're done, you should see nine selection rows in total. Make sure you keep your Shift key held down as you click on each one, otherwise you’ll just replace the previous selection with the new one:
Step 7: Switch To The Single Column Marquee Tool
We need to do the same thing now with the vertical grid lines, which means we need to switch to the Single Column Marquee Tool. Click and hold on the Single Row Marquee Tool in the Tools panel (it will appear where the Rectangular Marquee Tool icon appeared earlier) until the fly-out menu appears, then choose the Single Column Marquee Tool from the menu:
Step 8: Click On Each Vertical Grid Line
The Single Column Marquee Tool acts the same way as the Single Row Marquee Tool, the only difference being that it selects columns of pixels (top to bottom) rather than rows, with each column being 1 pixel wide. Press and hold your Shift key and click on each of the vertical grid lines from left to right until they're all selected. When you're done, you should see selection outlines along every grid line, both horizontal and vertical:
Step 9: Fill The Selection With Black
We'll create our grid by filling the horizontal and vertical selections with black. Go up to the Edit menu at the top of the screen and choose Fill:
This opens Photoshop's Fill dialog box. Set the Use option at the top to Black, then click OK:

Photoshop fills the selection with black, although it may be hard to see with the selection outlines and Photoshop's own grid in the way. To remove the selection outlines (since we don't need them anymore), go up to the Select menu at the top of the screen and choose Deselect:
Then, to turn off Photoshop's grid, go up to the View menu, choose Show, then once again choose Grid. A checkmark to the left of the word Grid means it's currently turned on. Selecting it again will remove the checkmark and turn the grid off:

With the selection outlines and Photoshop's grid removed, we can see our black grid in the document:
Step 10: Open The Photo You Want To Display In The Grid
Open the photo you'll be displaying inside the grid. The photo will open in its own tabbed document. Here's the photo I'm using:
Step 11: Select And Copy The Photo
At the moment, our grid is in one document and our photo is in another. We need to move the photo into the same document as the grid. To do that, first select the photo by going up to the Select menu at the top of the screen and choosing All:
A selection outline will appear around the edges of the photo. Then, go up to the Edit menu at the top of the screen and choose Copy:
Step 12: Switch Over To The Grid Document
Switch over to the grid document by clicking on its tab just below the Options Bar at the top. In my case, the document is named simply "Untitled-1":
Step 13: Select The Background Layer
With the grid document open, click on the Background layer in the Layers panel to select it. This way, when we paste the photo into the document, Photoshop will place it on a new layer directly between the Background layer and the Grid layer:
Step 14: Paste The Photo
Go up to the Edit menu, choose Paste Special, then choose Paste in Place:
Photoshop pastes and centers the photo into the grid document. In my case (and most likely yours as well) the photo will need to be resized, but we'll fix that next:
If we look in the Layers panel, we see that Photoshop has added the photo on its own layer between the Background and Grid layers, just as we planned:

Unfortunately, Photoshop gave the new layer a generic name ("Layer 1"), so before we continue, let's rename it. Double-click directly on its name to highlight it, then enter "Photo" as the new name. Press Enter (Win) / Return (Mac) on your keyboard when you're done to accept the name change:
Step 15: Convert The Photo Layer Into A Smart Object
In a moment, we'll resize the photo so it fits better within the grid, but before we do, let's quickly convert its layer into a Smart Object. That way, if we decide to resize it again later, we won't lose any of the photo's image quality. With the Photo layer selected, click on the small menu icon in the upper right corner of the Layers panel:
Choose Convert to Smart Object from the menu that appears:
Nothing will seem to have happened in the document, but a small Smart Object icon appears in the lower right corner of the layer's preview thumbnail in the Layers panel. This tells us the layer is now a Smart Object:
Step 16: Resize The Photo With Free Transform
To resize the photo, we'll use Photoshop's Free Transform command. Go up to the Edit menu at the top of the screen and choose Free Transform:
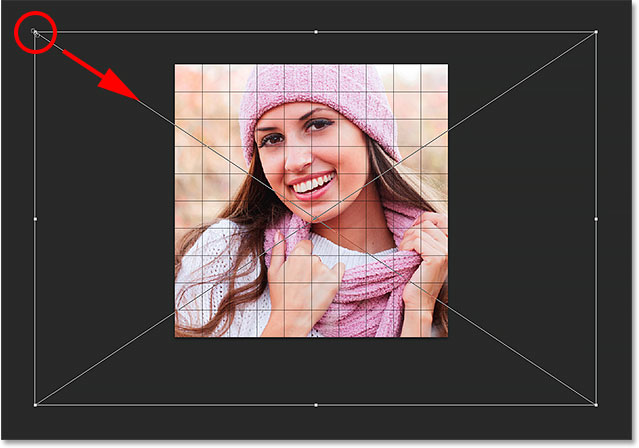
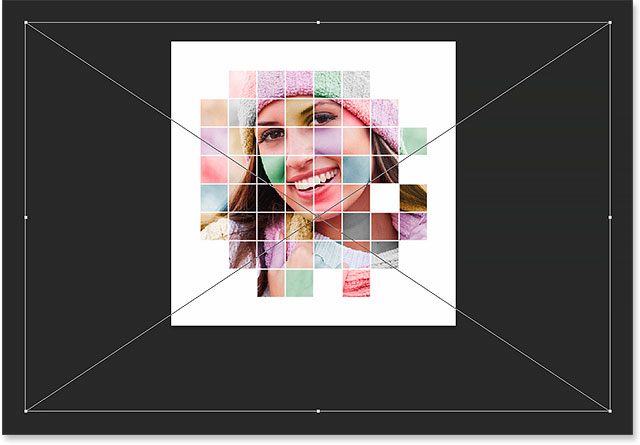
This places the Free Transform bounding box and handles around the image. If you can’t see the handles because the edges of your photo extend beyond the viewable area in the document, go up to the View menu and choose Fit on Screen:
Photoshop will instantly zoom the image out far enough so that everything, including the Free Transform handles, fits inside the viewable area of the document. To resize the photo, press and hold your Shift key, then click on any of the four corner handles and drag them. Holding the Shift key down as you drag will maintain the original aspect ratio of the image so you don’t accidentally distort the look of it. If you want to resize the photo from its center rather than from a corner, press and hold Shift+Alt (Win) / Shift+Option (Mac) as you drag any of the corner handles. If you need to move the image around inside the document, click anywhere inside the Free Transform bounding box and drag it into place. When you’re done, press Enter (Win) / Return (Mac) to accept the transformation and exit out of the Free Transform command:
If you zoomed the image out a moment ago using the Fit on Screen command and want to zoom back in now that you’re done resizing the image, go back up to the View menu and choose 100%:
Step 17: Select The Grid Layer
At this point, the hard work is done. We’ve created our grid, we’ve copied and pasted our photo into the grid’s document, and we’ve resized and moved the photo into position. We’re ready to have some fun colorizing the grid! First, click on the Grid layer in the Layers panel to select it:
Step 18: Select The Magic Wand Tool
To colorize the grid, we need a way to select the individual squares, and we can do that easily using Photoshop’s Magic Wand Tool. By default, the Magic Wand Tool is nested behind the Quick Selection Tool in the Tools panel, so click and hold on the Quick Selection Tool until a fly-out menu appears, then choose the Magic Wand Tool from the menu:
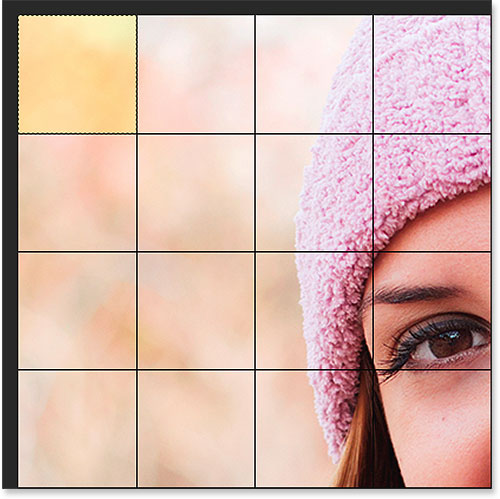
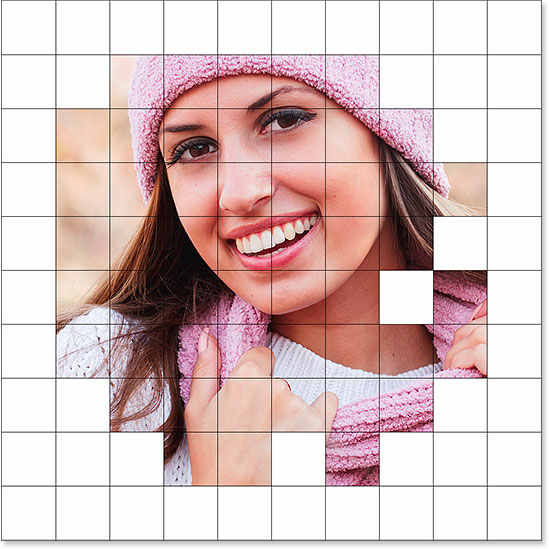
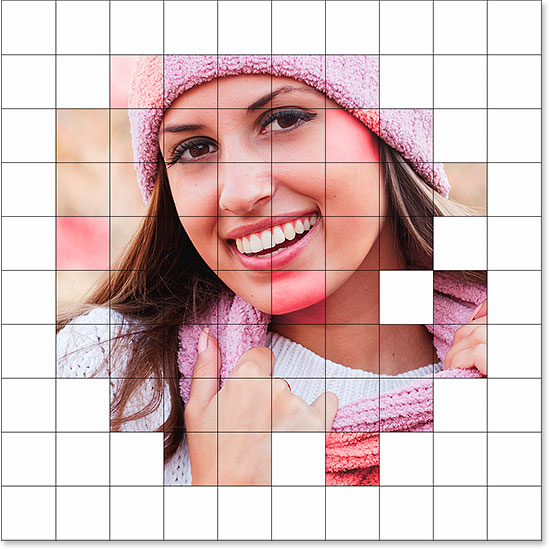
Step 19: Select The Outer Edge Squares
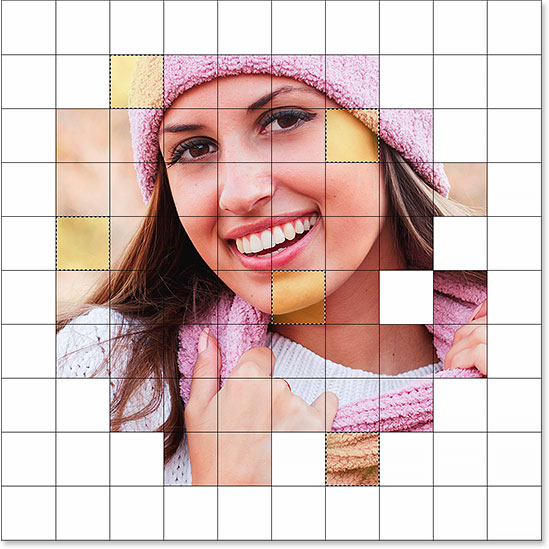
To select a square in the grid, make sure you have the Grid layer selected in the Layers panel (very important!), then simply click inside the square with the Magic Wand Tool. A selection outline will appear around the outer edges of the square. To then add additional squares to the selection, press and hold your Shift key and click inside more squares. You'll select each new square you click inside of, and the selection will be added to the previously-selected squares. Let’s begin by selecting all the squares around the outer edge of the grid. First, click inside the square in the top left corner of the grid. A selection outline will appear around it. To make it easier to see which square I’ve selected, I’ve colorized it in yellow in the screenshot. This isn’t part of the effect; it’s just to make it easier to see which square is selected:
Next, press and hold your Shift key and continue clicking with the Magic Wand Tool inside each of the squares around the outer edges of the grid to add them all to the selection. Again, I've colorized the selected squares in yellow here just to make things easier to see in the screenshot. The yellow is not part of the actual effect so don't worry that you're not seeing it in your document:
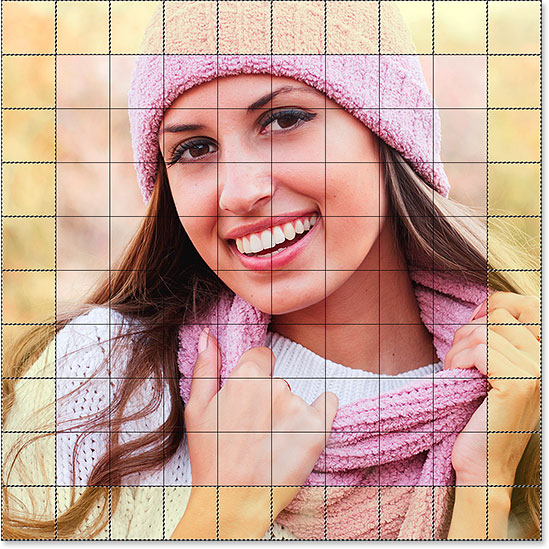
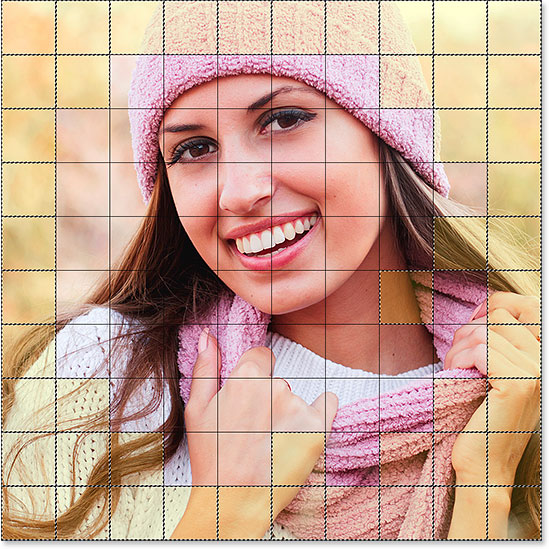
I’m going to add a few more squares to my selection as well by again pressing and holding my Shift key and clicking inside them to add them to the previously-selected squares:
Step 20: Add A New Layer Below The Grid Layer
We’ll fill these initial squares with white, which will create a border for the effect. Press and hold Ctrl+Alt (Win) / Command+Option (Mac) on your keyboard and click on the New Layer icon at the bottom of the Layers panel:
This pops open the New Layer dialog box. Name this new layer "White", then click OK:
Photoshop adds a new blank layer named "White" between the Grid and Photo layers:
Step 21: Fill The Selection With White
Go up to the Edit menu at the top of the screen and once again choose the Fill command. This time, when the Fill dialog box appears, change the Use option to White, then click OK:
Photoshop fills the selected squares with white. To remove the selection outline from around the squares, go up to the Select menu and choose Deselect or just press Ctrl+D (Win) / Command+D (Mac) on your keyboard:
Step 22: Select The Grid Layer Once Again
Let’s select a few different squares to colorize. First, we need have the Grid layer active in the Layers panel, so click on it to select it. Remember, you always need the Grid layer selected before you can select any squares:
Step 23: Select Different Squares
With the Grid layer once again active, press and hold your Shift key and click inside other random squares with the Magic Wand Tool to select them. If you change your mind and want to remove a square from the selection, release the Shift key and press and hold your Alt (Win) / Option (Mac) key, then click inside the square to deselect it. Here, I've selected a few more squares (and colored them yellow so we can see which ones I've selected):
Step 24: Select The Photo Layer
With your squares selected, click on the Photo layer (the Smart Object) in the Layers panel to select it:
Step 25: Colorize The Squares With A Hue/Adjustment Layer
We'll colorize these squares using a Hue/Saturation adjustment layer. Click on the New Adjustment Layer icon at the bottom of the Layers panel:
Choose Hue/Saturation from the list that appears:
The controls and options for the Hue/Saturation adjustment layer will appear in Photoshop's Properties panel. First, select the Colorize option by clicking inside its checkbox. Then, choose the color you want to colorize the selected squares with by dragging the Hue slider. For these squares, I’m actually going to leave the Hue slider set all the way to the left (its default position) which gives me red. Of course, you can choose whichever color you like. Once you've chosen a color with the Hue slider, you can adjust its saturation to your liking by dragging the Saturation slider left or right. For my red color, I'm going to set my Saturation value to around 50. Keep an eye on your document as you drag the sliders to preview the results:
Step 26: Change The Adjustment Layer's Blend Mode To Color
If we look in the Layers panel, we see the adjustment layer sitting directly above the Photo layer. Make sure it’s selected (highlighted in blue), then go up to the Blend Mode option at the top of the Layers panel and change its blend mode from Normal (the default mode) to Color. This allows us to change only the colors in the image, not the brightness values:
Here's my document after colorizing the squares with red:
Step 27: Rename The Adjustment Layer
Since we'll be using multiple Hue/Saturation adjustment layers to colorize the grid, let's keep track of which one is being used for which color by renaming them. Since I've used this first Hue/Saturation layer for red, I'll double-click on its name in the Layers panel and change its name from the generic "Hue/Saturation 1" to "Red". Press Enter (Win) / Return (Mac) on your keyboard to accept the name change:
Step 28: Select And Colorize More Squares
Repeat steps 22-27 to select and colorize more squares. First select the Grid layer in the Layers panel, then press and hold your Shift key and click inside a few squares with the Magic Wand Tool to select them. Click on the Photo layer in the Layers panel to select it, then click on the New Adjustment Layer icon and choose Hue/Saturation. In the Properties panel, check the Colorize option, then choose a color with the Hue slider and a saturation level with the Saturation slider. Change the blend mode of the new adjustment layer to Color, then rename the adjustment layer based on the color you chose.
You can also use a Hue/Saturation adjustment layer to completely desaturate some of the squares, leaving them black and white. To do that, select some squares, then add a Hue/Saturation adjustment layer as you normally would, but rather than choosing a color with the Hue slider, simply drag the Saturation slider all the way to the left (to a value of -100), which will remove all the color:

Here's my result after selecting and colorizing more of the squares. I've used six Hue/Saturation adjustment layers in total — one for red (hue:0, saturation:50), yellow (hue:40, saturation:50), green (hue:120, saturation:20), blue (hue:200, saturation:20), and purple (hue:300, saturation:20), plus one for black and white (saturation:-100):
And here, we can see all six of my Hue/Saturation adjustment layers in the Layers panel, each one named according to its color:
Step 29: Change The Color Of The Grid Lines To White
Now that we've colorized our squares, let's change the appearance of the grid lines themselves, first by changing their color from black to white. Click on the Grid layer in the Layers panel to select it:
Then, click the Lock Transparent Pixels icon just below the Blend Mode option at the top of the Layers panel:
With the Lock Transparent Pixels option enabled, anything we do to the layer will affect only the grid lines themselves. It will have no effect on the transparent areas of the layer. This way, if we fill the layer with, say, white (as we're about to do), only the grid lines will be filled with white. The transparent areas will remain transparent.
Go up to the Edit menu and once again choose Fill. When the Fill dialog box appears, the Use option should already be set to White since that’s what we set it to last time, so just click OK to close out of the dialog box:
Photoshop fills the grid lines with white:

Step 30: Add A Stroke Layer Style
If you want to increase the thickness of the grid lines, click on the Layer Styles icon (the "fx" icon) at the bottom of the Layers panel:
Choose Stroke from the list that appears:
This opens Photoshop's Layer Style dialog box set to the Stroke options in the middle column. First, let's change the color of the stroke to white. Click on the color swatch to the right of the word Color:
This opens the Color Picker. Choose white as the new color for the stroke, then click OK to close out of it:
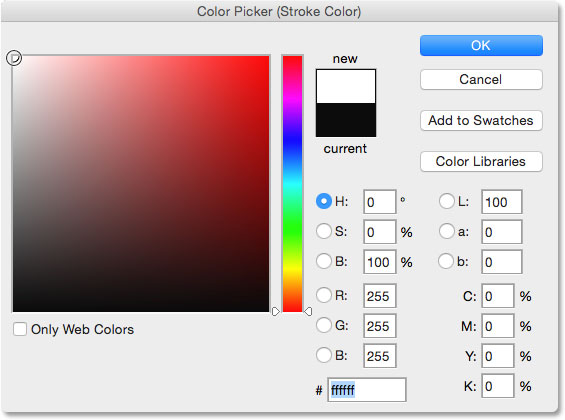
With white now as the stroke color, set the Position option to Outside, then adjust the width of the stroke by dragging the Size slider. You probably won't want to increase the size very much. I'm going to set mine to 2 px:

Click OK when you're done to close out of the Layer Style dialog box. Here's my effect with the white and slightly wider grid lines:

Step 31: Move And Resize The Photo Again If Needed
At this point, now that the grid design is complete, you may decide that you need to resize and/or reposition the photo. In my case, I think I'm pretty happy with the way things look, but if you do need to move or resize your photo, click on the Photo layer in the Layers panel to select it:
Then, simply use the same steps we covered back in Step 16 to resize and/or move the image. First, go up to the Edit menu and choose Free Transform (or press Ctrl+T (Win) / Command+T (Mac) on your keyboard) to bring up the Free Transform box and handles around the photo. If you can't see the handles because your photo extends beyond the visible area of the document, go up to the View menu and choose Fit on Screen (or press Ctrl+0 (Win) / Command+0 (Mac) on your keyboard). Press and hold Shift while clicking and dragging any of the corner handles to resize the photo, or press and hold Shift+Alt (Win) / Shift+Option (Mac) to resize the photo from its center rather than from a corner. To move the photo, simply click and drag anywhere inside the Free Transform box. I'm going to drag my photo downward just a little bit, but I'll leave the size the same as it was before:
Note that because we converted the photo into a Smart Object way back in Step 15, we can safely resize it again without any loss in image quality. When you're happy with the final size and position of your image, press Enter (Win) / Return (Mac) to accept it and close out of the Free Transform command. Then, to zoom back in on the image, go up to the View menu and choose 100% (or press Ctrl+1 (Win) / Command+1 (Mac) on your keyboard):

Step 32: Crop The Image (Optional)
This final step is optional, but if you want to crop away some of the white border around the grid, select Photoshop's Crop Tool from the Tools panel:
With the Crop Tool selected, set the Aspect Ratio option on the left of the Options Bar to Original Ratio:
You'll see a cropping border appear around the edges of the document, with crop marks on all four sides and in the corners. Press and hold the Alt (Win) / Option (Mac) key on your keyboard as you click and drag any of the four corner crop marks inward to crop away some of the white border:
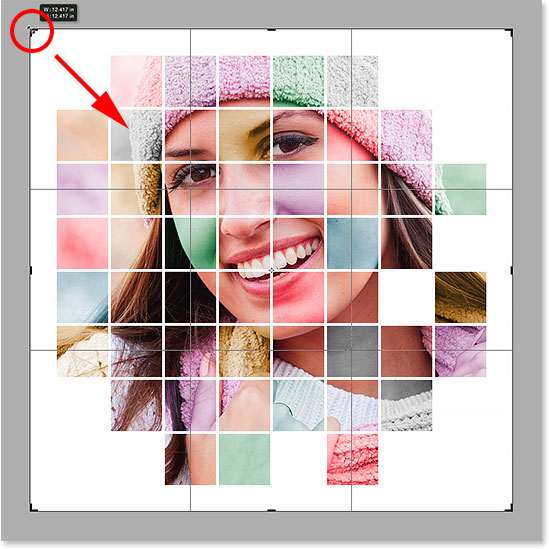
Press Enter (Win) / Return (Mac) on your keyboard to crop the image, and we're done! Here, after cropping away some of the border, is my final result:
 Tags :-
Photoshop 8 ,
Photoshop 7 trick ,
trick for Photoshop CS6 ,
photoshop PNG ,
Png Images ,
image png ,
png ,
transparent images ,
transparent png ,
psd ,
psd image ,
png free ,
download png ,
png for free ,
png blogspot ,
png photoshop ,
photoshop png images ,
images for photoshop ,
cs5 trick ,
photoshop tricks ,
photoshop tricks ,
photoshop background ,
photoshop psd ,
photoshop cs5,
photoshop cs5 trick,
Tags :-
Photoshop 8 ,
Photoshop 7 trick ,
trick for Photoshop CS6 ,
photoshop PNG ,
Png Images ,
image png ,
png ,
transparent images ,
transparent png ,
psd ,
psd image ,
png free ,
download png ,
png for free ,
png blogspot ,
png photoshop ,
photoshop png images ,
images for photoshop ,
cs5 trick ,
photoshop tricks ,
photoshop tricks ,
photoshop background ,
photoshop psd ,
photoshop cs5,
photoshop cs5 trick,


No comments:
Post a Comment
DO NOT SPAMM HERE OR OTHER LINKS HERE
ADMIN WATCH YOU ALWAYS