


In this tutorial we are going to learn how to create an awesome text effect using Renders.
Tutorial Details
Program: Photoshop CS5
Estimated Completion Time: 30 Minutes
Tutorial Assets
The following assets were used during the production of this tutorial
Now we got everything we need so let's start designing!
Step 1:- Create a new file with 1200px with and 1200px height.

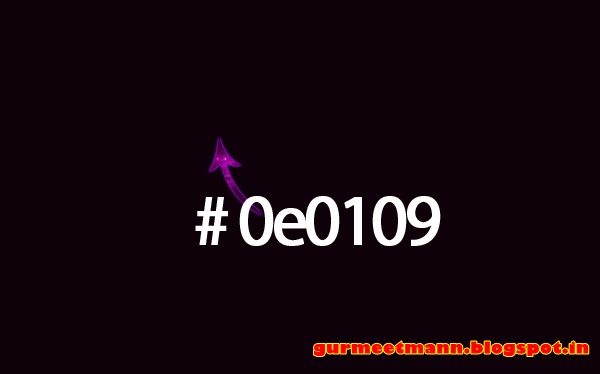
Step 2:- Select the 'Paint Bucket' and fill the background with # 0e0109.
Step 3:- Now create a new layer. Click on Layer> New> Layer and use some of the brushes mentioned above with color #ffffff and 4c0835.

Step 4:- Select the 'Ellipse Tool' and create a circle. Fill it with color # ffffff and change the blending mode to 'Overlay'.

Step 5:- Now click on Layer> Layer style> Bevel and Emboss.

Step 6:- Create a new layer and select the soft round brush. Use different colors and then change the blending mode of the layer to 'Color'.
Step 7:- Now open the render and paste it on our file.

Step 8:- Now duplicate the render layer a few times. You can also change the color by pressing CMD/CTRL + U.

Step 9:- Select the 'Text Tool' and add the text in the middle.

Step 10:- Now we are going to stylize our text, so click on Layer> Layer style> Drop shadow.

Step 11:- Click on Layer> Layer style> Gradient Overlay. Reduce the opacity to 50%.

Step 12:- This time Layer> Layer style> Stroke. Add stroke with color # e1e1e1.

Step 13:- Repeat the same process with each letter and you can use different color of stroke for each.

Step 14:- Now open another render and place it on our first letter. Cut it in the shape of our letter using 'pen tool'.

Step 15:- Repeat the same process with the remaining letters.

Step 16:- Now duplicate the renders one more time and this time place them over the text. Now select the 'Eraser Tool' and erase them so only some bits of them are on the text edges.

Step 17:- Create a new layer and Select the 'Polygonal Tool' and create a shape with it in the middle.

Step 18:- Select the 'Paint bucket' and fill the selection with # ffffff.

Step 19:- Now change the blending mode to 'Overlay'.

Step 20:- Repeat the same process on each letter.

Step 21:- Now create a new layer and select 'Soft round brush'. Use it on the edges with color # 75172d. Then change the blending mode to 'Color' and we are done.
Our awesome Text Effect is ready. Hope you guys liked the tutorial and learn something interesting. We will be back some more awesome tutorials. Till then have fun designing!
 Tags :-
Photoshop 8 ,
Photoshop 7 trick ,
trick for Photoshop CS6 ,
photoshop PNG ,
Png Images ,
image png ,
png ,
transparent images ,
transparent png ,
psd ,
psd image ,
png free ,
download png ,
png for free ,
png blogspot ,
png photoshop ,
photoshop png images ,
images for photoshop ,
cs5 trick ,
photoshop tricks ,
photoshop tricks ,
photoshop background ,
photoshop psd ,
photoshop cs5,
photoshop cs5 trick,
Tags :-
Photoshop 8 ,
Photoshop 7 trick ,
trick for Photoshop CS6 ,
photoshop PNG ,
Png Images ,
image png ,
png ,
transparent images ,
transparent png ,
psd ,
psd image ,
png free ,
download png ,
png for free ,
png blogspot ,
png photoshop ,
photoshop png images ,
images for photoshop ,
cs5 trick ,
photoshop tricks ,
photoshop tricks ,
photoshop background ,
photoshop psd ,
photoshop cs5,
photoshop cs5 trick,


No comments:
Post a Comment
DO NOT SPAMM HERE OR OTHER LINKS HERE
ADMIN WATCH YOU ALWAYS