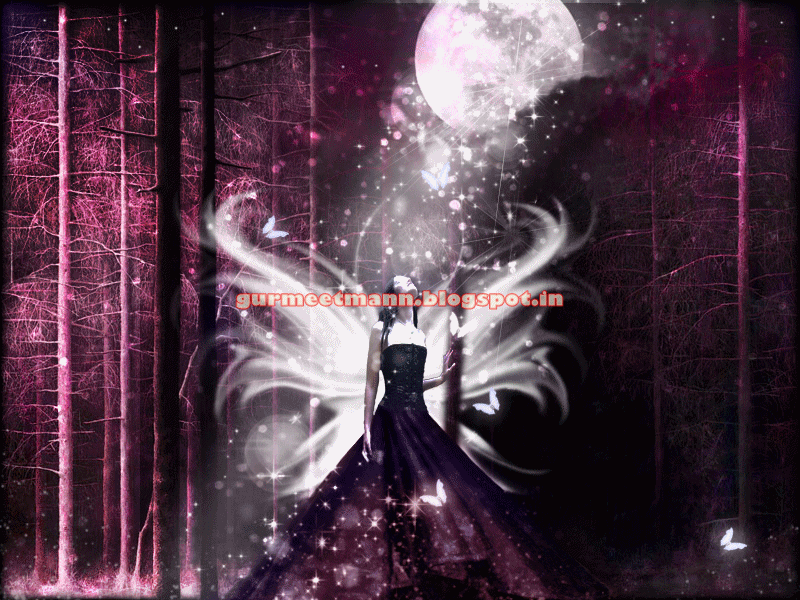

In this tutorial you will learn how to add beautiful animated effects to an image in Photoshop by creating an animated gif. You can view the animated image effect below.
Tutorial Details
Program: Photoshop CS5
Estimated Completion Time: 20 Minutes
Tutorial Assets
The following assets were used during the production of this tutorial :
Fantasy Design - We will be using the Magical Fantasy image that we have taught in this tutorial
Now that we have everything we need, so let’s start!
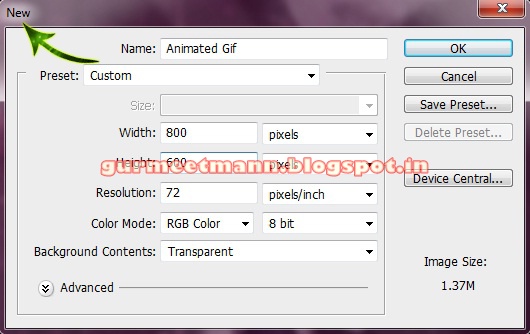
Step 1:- Create a new file with 800px width and 600px height.
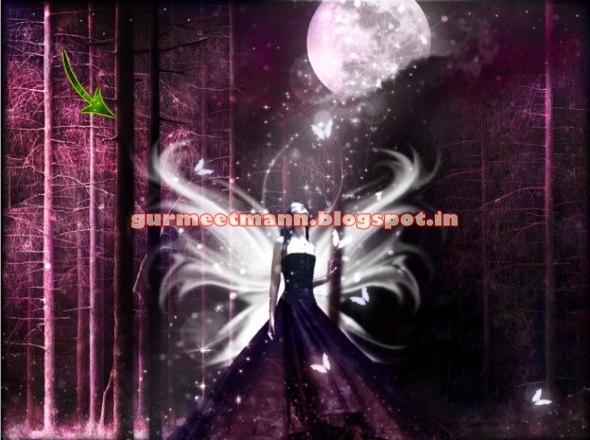
Step 2:- Open the PSD of the Fantasy tutorial mentioned above.
Step 3:- Now before we start with the animation process lets duplicate some layers first. So the first we are going to find the “Glitter” group in the layer panel.
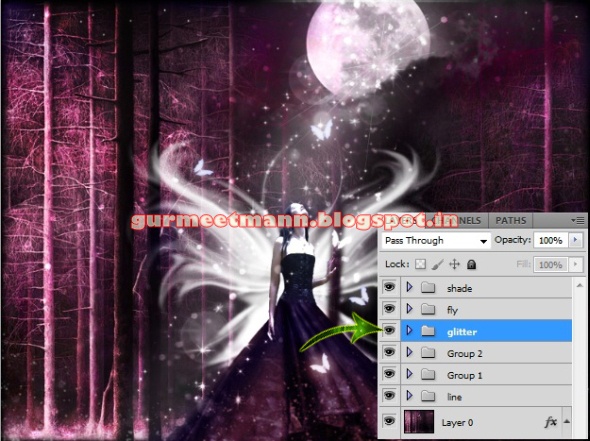
Step 4:- Now right click on the “Glitter” and select duplicate group.

Step 5:- Now we are ready to start our animation, but first we need to open the animation panel. So for this go to Window> Animation.
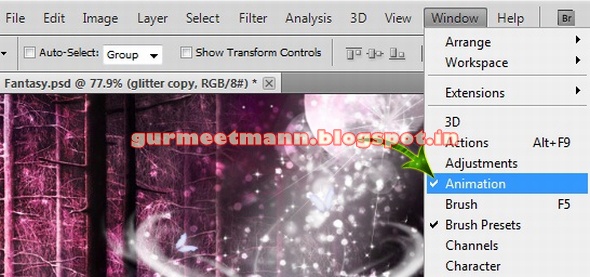
Step 6:- You’ll get something like this it’s the animation timeline.

Step 7:- Now we need to go to the frames so for this click on the Convert button on the down right corner.

Step 8:- Now we can work with our frames. There are some options which we are going to use to create our animation. So first click on “Duplicate selected frame”.
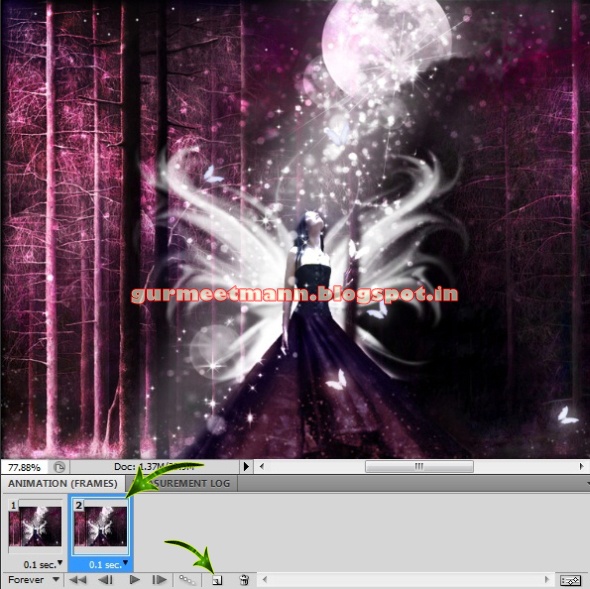
Step 9:- Now the fun part begins, open the glitter group we copied earlier. And select the start layer and move it a bit down.
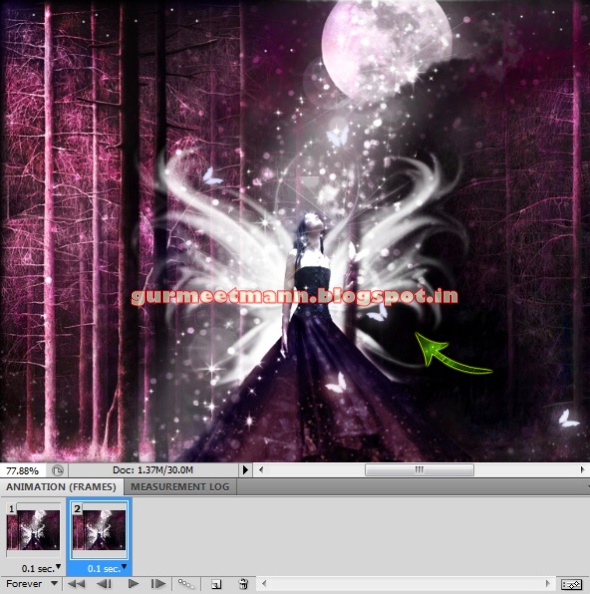
Step 10:- Now repeat the same process with all the other layers. But make sure you don’t move them too much.

Step 11:- Now click on the “Tweens” button and create 50 frames between our two basic frames. So we can have a nice and smooth animation.

Step 12:- Click on the last frame and then again click on the “Duplicate the selected frame”.

Step 13:- Now move the layer all the way down.

Step 14:- Click on the “Tweens” again and this time create 30 frames.

Step 15:- Now let’s look at some of the frame options we have. There are different time options available for frames. So you can select how much time do you want one frame to have. For this animation we are going to choose o.1 second.

Step 16:- You can also select how many times do you want the animation to play. For this one we’ll select “forever”.

Step 17:- Now you can play the animation and check if everything is fine. So click on the “Convert” button again go get the timeline and click on “play”.
Step 18:- Now so save this click on file> Save for Web & devices and save as a gif file.
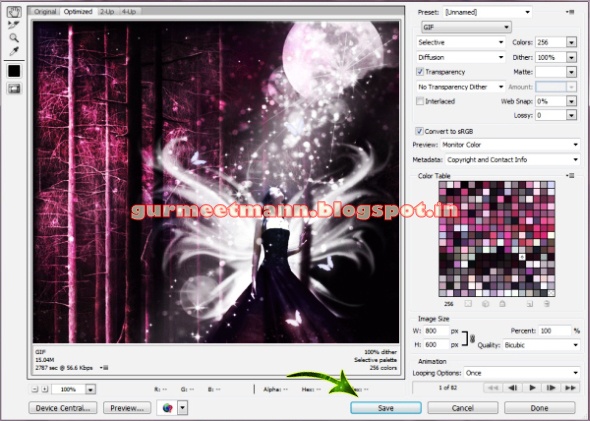
And now our Beautiful animation gif is ready. Hope you guys enjoyed the tutorial and learn something interesting. We’ll be back with some more fun tutorials, till then keep designing!

 Tags :-
Photoshop 8 ,
Photoshop 7 trick ,
trick for Photoshop CS6 ,
photoshop PNG ,
Png Images ,
image png ,
png ,
transparent images ,
transparent png ,
psd ,
psd image ,
png free ,
download png ,
png for free ,
png blogspot ,
png photoshop ,
photoshop png images ,
images for photoshop ,
cs5 trick ,
photoshop tricks ,
photoshop tricks ,
photoshop background ,
photoshop psd ,
photoshop cs5,
photoshop cs5 trick,


No comments:
Post a Comment
DO NOT SPAMM HERE OR OTHER LINKS HERE
ADMIN WATCH YOU ALWAYS